EarthLink Email Settings
If you are a user of EarthLink mail and are wondering as to what are the EarthLink Email settings then you have come to the right place. In this article, we will take you through all the stepwise Earthlink email settings for different device types and Outlook versions. The settings are well-described and you won’t find any step that is hard to follow or execute. Through the settings mentioned below, you will be able to set up your Earthlink account on your device or outlook without much hassle. The settings will work 100% as all of them are tried and tested. The settings mainly comprise of two different email server settings i.e. EarthLink IMAP settings and EarthLink SMTP settings. The IMAP server handles the incoming emails and the SMTP server handles the outgoing emails of your account.
EarthLink IMAP Settings
Below mentioned are the general EarthLink IMAP settings that you need to apply in order to use the incoming email services with ease.
- Log in to your EarthLink email account.
- In the upper left corner, click on settings.
- Now choose accounts.
- Choose IMAP from the drop-down menu.
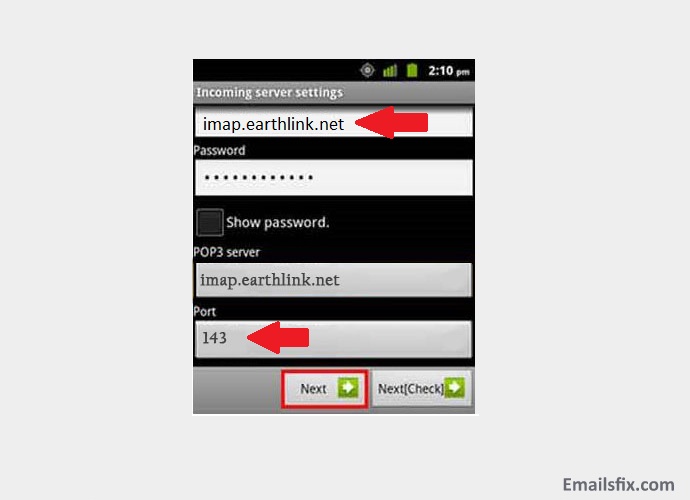
- In the ‘Incoming Mail Server’ option, enter ‘imap.earthlink.net
- The value in the ‘Incoming Port Number’ should be ‘143’
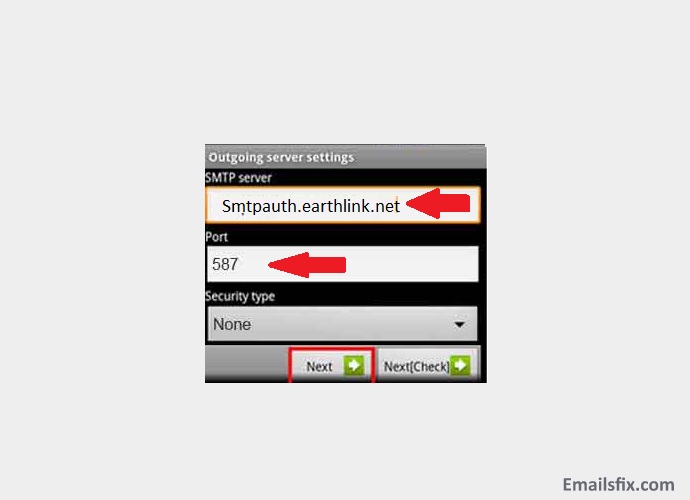
- ‘Smtpauth.earthlink.net’ should be entered as ‘Outgoing Mail Server’
- 587 should be entered as the Outgoing Port Number.
- Click on accept.
- Now you have set up your account using IMAP.
EarthLink Email SMTP Server Settings
Find below the required EarthLink email SMTP server settings for using the outgoing email services without any problem.
- Click on the Mail icon.
- Go to the Accounts Section
- Enter your EarthLink email id
- In the username section, enter the full email address
- Enter your email password when prompted for the same.
- The server hostname should be smtpauth.earthlink.net
- The port value should be 587
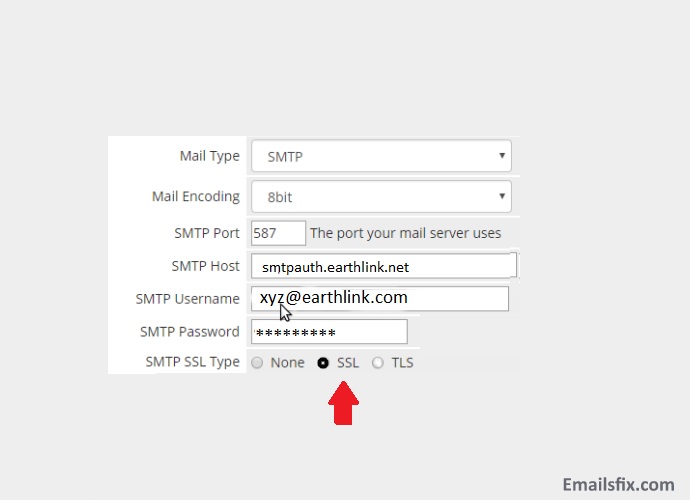
- SSL/TLS certificate should be Yes
- If test settings are enabled, then run the test.
- If everything checks out then you have enabled the SMTP auth Earthlink net settings.
EarthLink Email Settings For iPhone and iPad
Are you struggling with the EarthLink email server settings for iPhone and iPad? Well, you can relax now as the steps and procedures given below will solve your Earthlink net server settings for the iPhone issue. All the steps are easy and you won’t be facing any difficulty in following them.
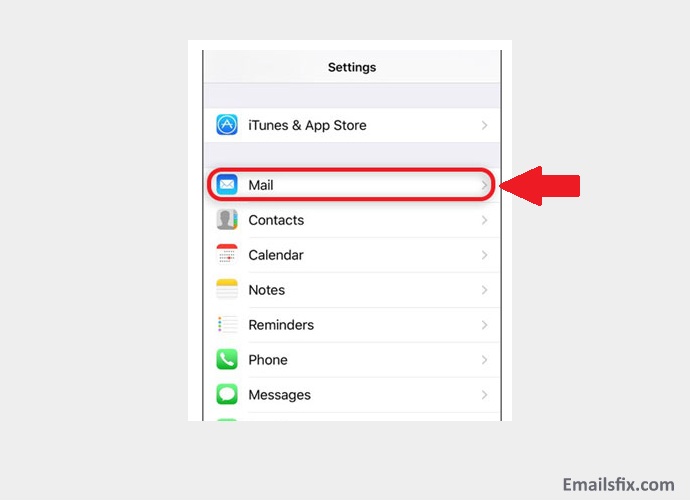
- Go to settings.
- You will have to scroll down and choose Mail, Contacts, and Calendars

- Select ‘Other’ from the Add account tab.

- Under the Add Mail Account tab, enter the following information.
- Enter your full name
- Enter your full email address
- Enter your mail password
- In the descriptions enter ‘EarthLink’

- For ‘Incoming Mail Server setting enter:-
The hostname should be pop.earthlink.net
Username should be your email id
Your email password should be the default pass.

- For ‘Outgoing Mail Server Settings’, enter the following:-
The Hostname should be smtpauth.earthlink.net
The Email should be the username
Your email id password should be used as the password.

- Tap save and go to the next screen
- Under the ‘Mail Server Settings’ enter the following:-
SSL should be left as is
Server port value should be 587
- Click on Save
- Restart your iPad or iPhone
We are confident that the aforementioned steps describing the EarthLink webmail server settings for iPhone and iPad must have helped you in configuring your EarthLink account.
Earthlink Email Settings For Mac
Now let’s take a look at the EarthLink email settings for Mac. The EarthLink email server settings are fairly straight forward and will work for most of the Mac versions.
- Firstly, open the Mail app from the application folder or dock menu.
- Now, the “Welcome to Mail” assistant will appear if you are setting the first email account and you need to click on continue to move forward with the steps. If you have already configured an email account, the mail window will open.

- Click on the “File” option and then select “Add Account”.
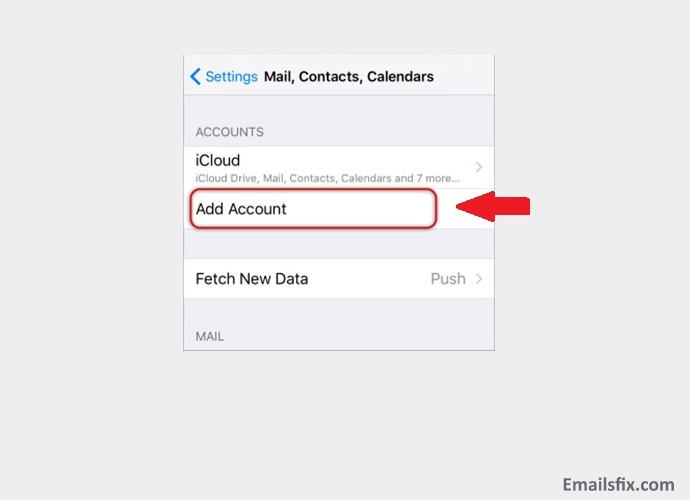
- Next click on ‘Other’
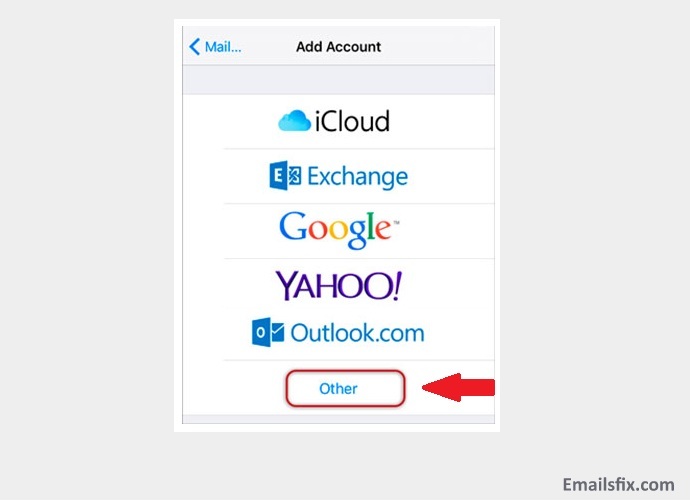
- Under the Add Account section, input the following:
Enter your name in the place of the Full Name field.
Enter your complete email address in the Email Address field.
Enter the password in the place of the password field.
- Click on the “Continue” button.
- Under the Incoming mail server window, input the details as below for incoming mail server:
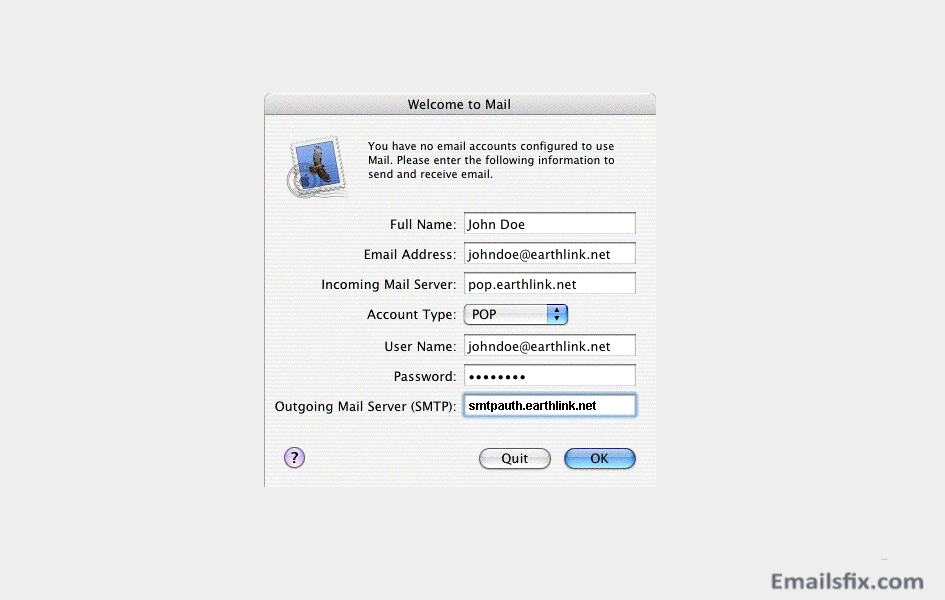
Select the “POP” option for the account type.
Input pop.earthlink.net in the place of the incoming mail server field.
Input your complete EarthLink email address in the Username field.
Input the password in the place of the password field.
- Click on the “Continue” button.
- Now, under the incoming mail security section, select the “password” option for Authentication and check the SSL option also.
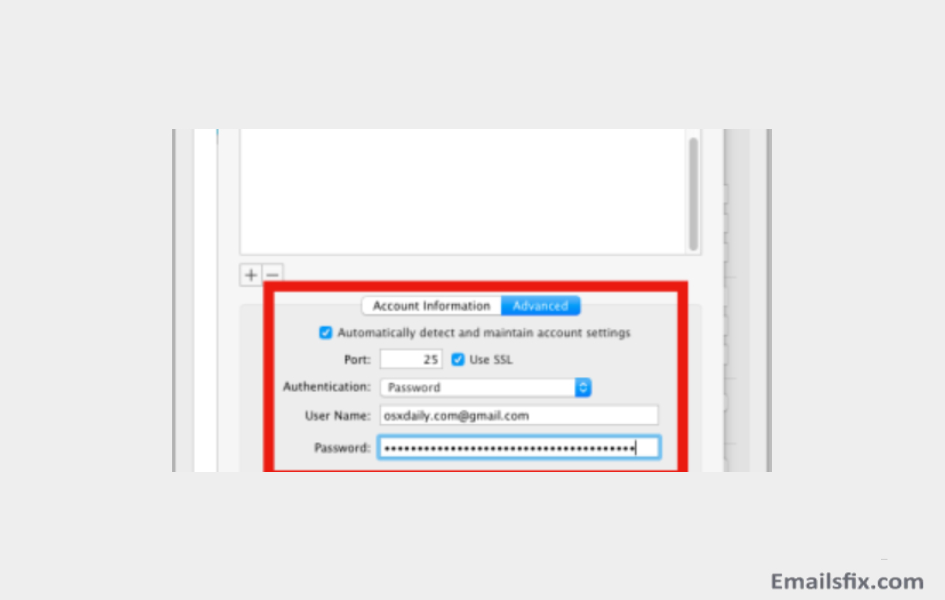
- For the outgoing mail server section, make a click on arrow present on the drop-down menu and then select “Edit Server List”. Use “Smtpauth.earthlink.net” for the outgoing mail server.
- Check the option of “Use only this sever”.

- Select the “Use authentication” checkbox.
- Input the username and password in the respective fields.
- Click on the “Continue” button.
- Choose “password” for the Authentication and select the “SSL” option under the outgoing mail security section.

- You will see the summary of the new account as per the settings applied by you, click on the “Create” button.
- In the end, your account will be created successfully and now you can send/receive emails without any problem.
After you apply the aforementioned EarthLink webmail server settings for mac, you will be able to use all the EarthLink email services on your mac without any hassle.
EarthLink Email Settings Android
Want to know the EarthLink email server settings for android? Just keep following the simple steps as mentioned below in sequence and your EarthLink account will be configured on your android device within a blink of an eye.
- Firstly, you need to go to your email application
- Choose Settings
- Click on ‘Add new mail’
- Select your EarthLink account.
- Now, select POP3
- Now enter your email id and password.
- Select Manual Set up
- In the Incoming Settings screen, enter the following details:-
 -Your Full Username
- The password of your email id
- Pop.earthlink.net should be entered in the Incoming server
- Port Value should be 995
- Security type should be SSL
 Click on Next
- Click on Next
- For Outgoing settings enter the following
- Smtpauth Earthlink net settings should be entered in ‘Outgoing Server’
- The value should reflect 587
- Enter Yes for ‘Authorisation required’
- Click on Next
- Enter your preference
- Give your account a name
Congratulations, you have successfully set up your Earthlink email settings for android account.
EarthLink Email Settings For Outlook
Know the correct EarthLink email settings for outlook here. The settings are more or less similar for all the Outlook versions, you can just go on following the below-mentioned steps.
- Open Outlook
- Click on ‘File’

- Go to ‘Account Settings’

- Switch the settings to ‘ON’
- Click Next
- Choose ‘Internet email Address’ and enter your EarthLink email address and your name.
- Go to ‘Account Type’
- Choose POP3 and then enter the following information
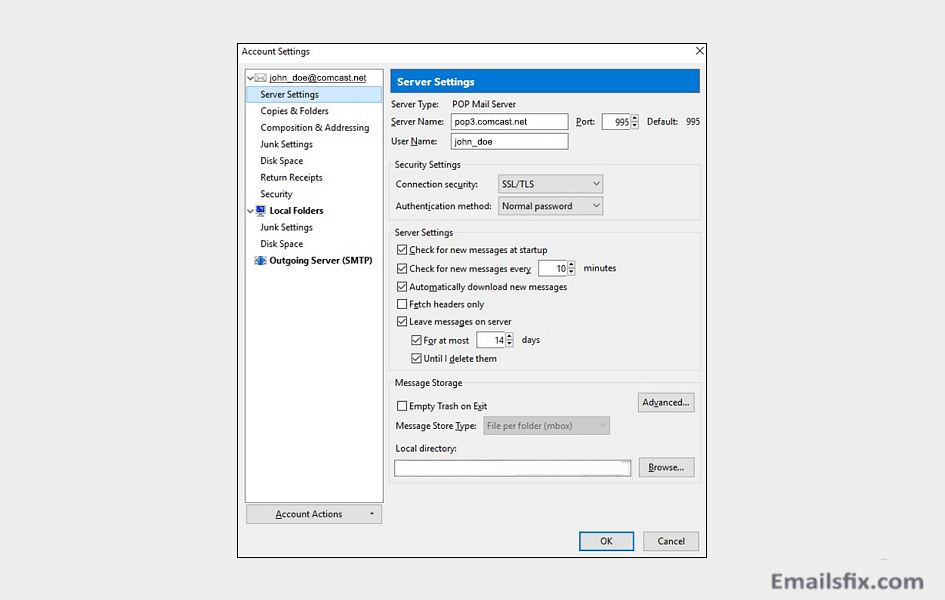
- The incoming email should be pop.earthlink.net.incoming
- Port Value should be 995
- Click On Save
- Enter your Login Information
- Click On ‘Test account settings’
- If everything checks out then you have successfully settings up your EarthLink email account with the Outlook.
Congratulations, you have successfully set up your Earthlink Email on Outlook.
Also, find here the perfect stepwise settings for more email service providers such as Frontier Email Settings and Juno email settings. You will find all the steps as simple as mentioned in this article and the settings will be provided for all the device types and Outlook versions. And, you can always connect with our technical team if stuck somewhere.
Are you still having trouble setting up your EarthLink email account? Don’t panic, just get connected to our technical team through the live chat support and get quick assistance. You can come up 24*7 with any Earthlink email related query or problem and get the perfect solution for it.
 EarthLink Email Settings For Mac, Android & Outlook