How to Insert Picture in Outlook 2007, 2010, 2013 & 2016

An image can change the game, yes, you heard it right, a multimedia Email carrying an image in its body can be more influential than just a textual email message. Several corporate offices use this influential tool of communication for a positive response from their receivers. Pictures that are inserted on the message body of an email are called Inline Pictures. You can use the inline picture to make your email, an infographic piece of information that can be easily understood besides, the image can be used additional information. In the message body, you can run your text around the image wrapping the inline picture.
Now, If you are wondering how to insert a picture in Outlook 2010, 2013, 2016 Email body then we are here to guide you with the exact solution for the same.
You need to check your picture file size and compression before you are going to insert a picture in Outlook 2013 email body.
Outlook 2010 and other versions of Outlook, in general, have some size limitation of the inline picture, which can obstruct the sending process of the mail.
You don’t need to worry about it as there are a number of tools for compressing images that you can either use an image editor application or you can do the same online going through Image setting websites.
Once, you complete resizing the picture, you have reached the solution of your query for how to insert a picture into the Outlook email 2010 email body.
How to Insert the Picture in Outlook 2010, 2013, 2016 Email Body
The process described below is applicable for how to insert pictures into Outlook email 2013, 2010, 2016, 2019 and 365.
1. As the first part of the process, start a New Email. As HTML text format is the best format to do the job, you need to select Format Text tab available in the new email message window

2. In order to Insert the Picture, move your cursor in your message body and mark the place where you want to place the image
3. Coming into the Illustration section, you need to select the desired image from an available folder of your computer
4. Once you select the picture, select Insert which comes as in available options on the selection of Picture

5. Giving a final touch, you can adjust the size of the picture by holding and dragging it
6. In this step, you need to decide how you are going to wrap text around an inline picture
7. just select the picture in the email message box, it will give you different options like In Line with Text and With Text Wrapping. Depending on your requirements, you can choose any of these available options.
How to Insert a Picture in Outlook 2007 Email Body
Steps ahead :
1. Start a new message and turn on HTML text format by going in the Format Section and selecting HTML
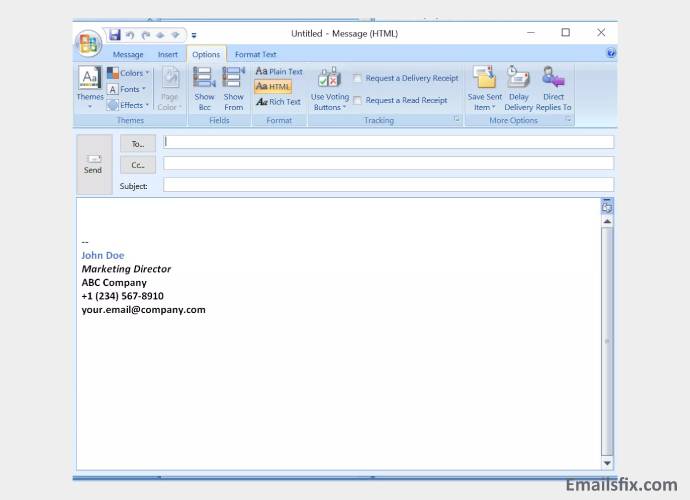
2. In order to Insert the Picture, move your cursor in your message body and mark the place where you want to place the image
3. Now selecting Insert option from the toolbox, you need to locate the desired picture then select it following inserting it
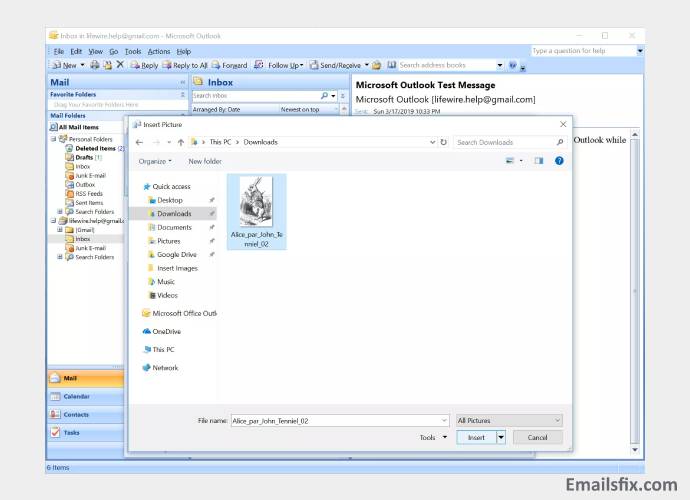
4. Voila, You will find your image at the marked spot in your message box
On a closing note, if you are still struggling in resolving the issue "How to Insert Picture in Outlook 2010, 2013, 2016 Email body" or maybe facing more issues/errors such as how to create a rule in Outlook, Slow and Disabled add-ins Outlook 2016, etc then you are advised to talk to our Emailsfix expert professionals though a chat process. All you need to do is just fill up these blank spaces so that our professionals get noticed and get back to you.
 How to Extract Email Addresses from Emails in Outlook
 How to Solve Outlook error 0x8004011d?
 Fix Microsoft Office Error: Sorry We Are Having Temporary Server Issues