Cox Webmail Settings
There are some settings that you can alter to your Cox mail account. In this article, we will take you through the various changes that you can make to your Cox email account.
Basic Cox Webmail Settings
We will start with some basic Cox webmail settings. Please note that you might have to reload the page so that the changes will take effect.
- You can use the language panel to choose your preferred language.
- Similarly, you can choose your preferred timezone.
- You can also choose a default page that will load up when you will log into Cox mail.
- Auto sign out and also be enabled or disabled.
- You can also edit your basic information from the ‘My Profile’ menu.

- You can change the theme from this menu too.
- You can also automate notifications from this menu.
- Passwords can also be altered from this menu.
Cox.Net Webmail SMTP Settings
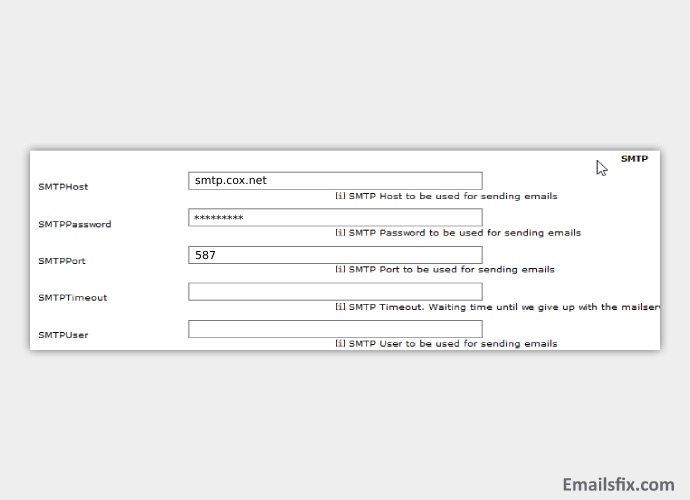
Now, let's take a look at Cox Webmail SMTP settings:-
- In the account type section choose SMTP
- Use your Cox email id as the username.
- Key in your password
- For ‘server hostname’ type ‘smtp.cox.net’
- Port number key should be 587
- Tick mark the ‘Required Authentication’ box.
- Choose ‘Yes’ as SSL/TLS certification.

We are sure that if you have followed the above-mentioned instructions properly then you will be able to set up your Cox email settings in no time. If still, you are not able to setup Cox Webmail, you can contact Emailsfix chat experts. Please note that these steps can be used to set up both desktop and mobile devices. If you are not sure about the model device of your device then you can reach out to Cox.