ATT.NET Email Settings For Android & iPhone

In this article, we will take you through the process of setting up ATT.NET email on your android & iPhone in a few simple steps. After following our guide, you can start sending and receiving emails on your phone. You will not need to lug around your laptop anymore and will have the ability to reply to all your mail on the go.
ATT.NET Email Settings For Android Phone
- Manual Set up

- Choose IMAP Account

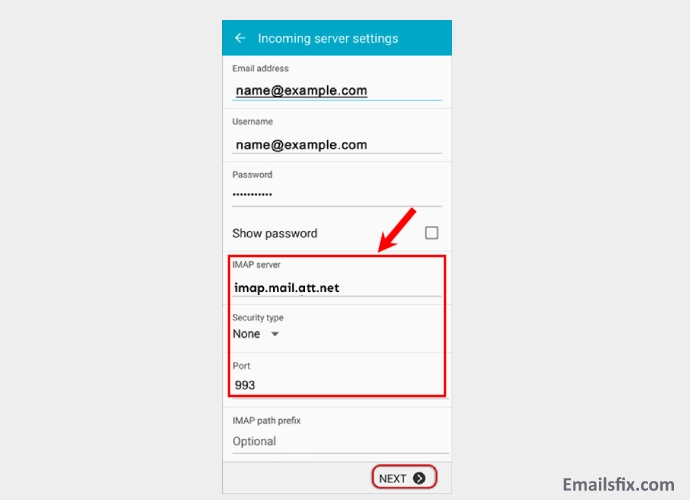
IMAP ( Be sure to enter the below necessary settings and then click ok)
IMAP Server: imap.mail.att.net
Security type is none
Port: 993 for IMAP
Secure Port: 993 and security Type: SSL/TLS ( Accepted all certificate)
Incoming Port: 143 and Security Type is None
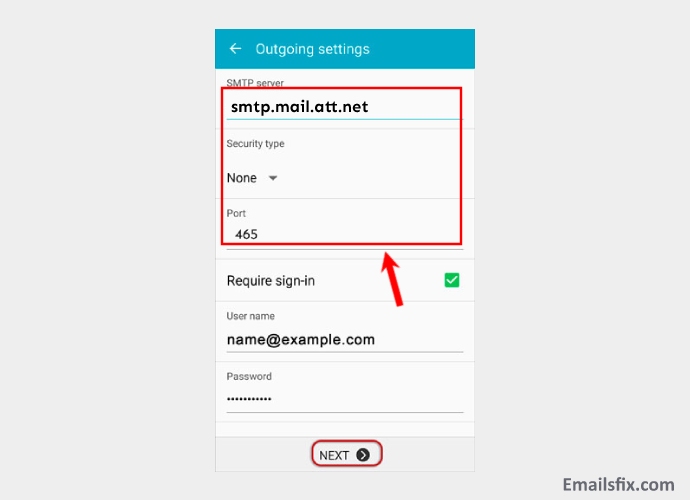
Enter the below outgoing SMTP settings for ATT.NET and click Next
SMTP Server: smtp.mail.att.net
Security Type is none
Port is 465 for outgoing SMTP
Outgoing Server (SMTP) – Secured Port: 465 and secure type: SSL/TLSOutgoing Server (SMTP roaming server) Secured Port: 587 and secure type: SSL/TLS
Outgoing Server (SMTP) Incoming Port: 587 and secure type is none ( Accepted all certificates)
Once you have successfully followed the given steps, you’re email set up has been updated for the android version.
ATT.NET Email Settings For iPhone
Manual Setup for an ATT.NET email account on your iPhone. The steps are simple to follow and are in sequence form: –
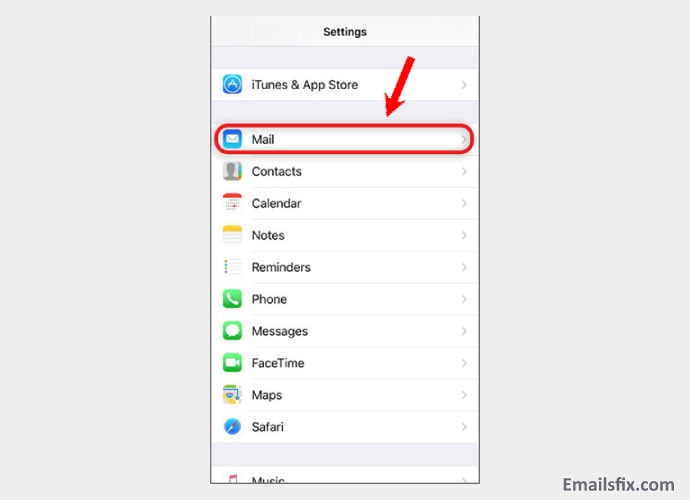
- You need to go on the settings icon on your Home page
- Then required to select Mail
- Moving ahead select the account
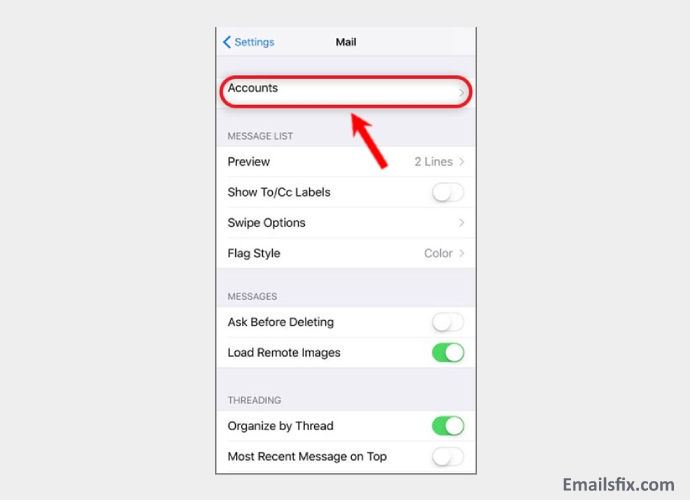
- Then select add account

- Now you can select other from the menu
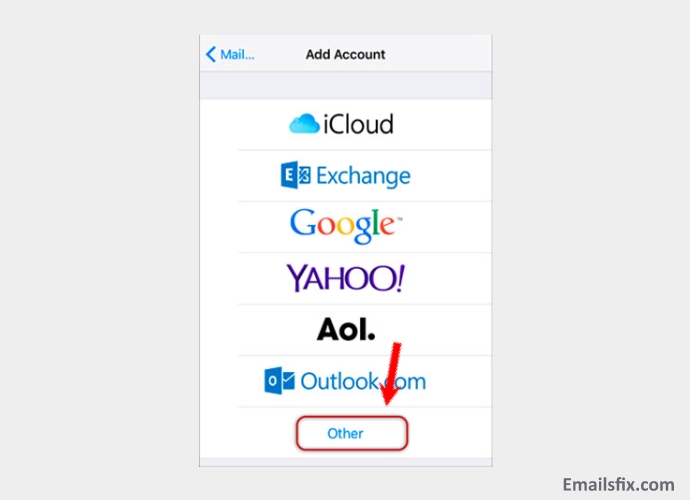
- Once done with it add mail account
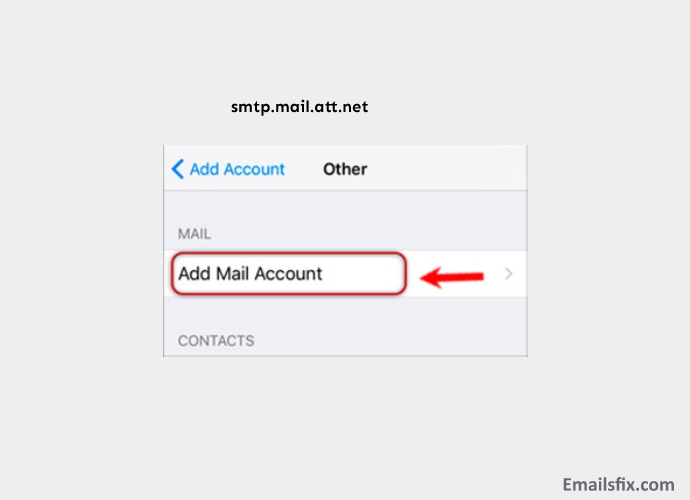
- Later enter all your necessary details including Name, Email and then Press click “Next”

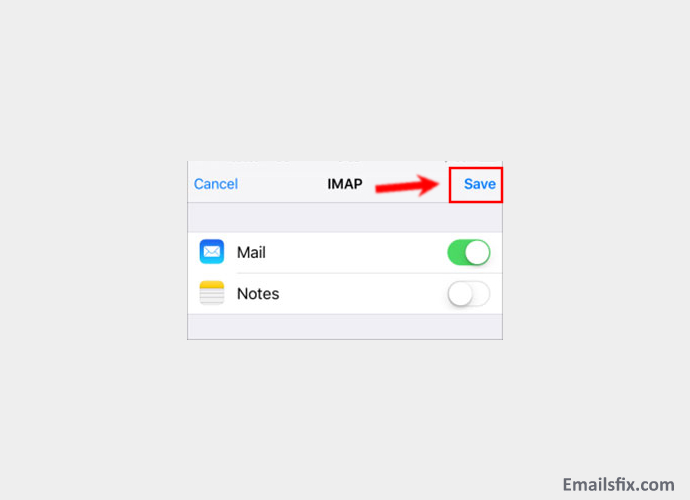
- Further, select IMAP and scroll down to Incoming Mail Server and then fill in all the required details
- It is necessary to do the same for the outgoing server as the screen below
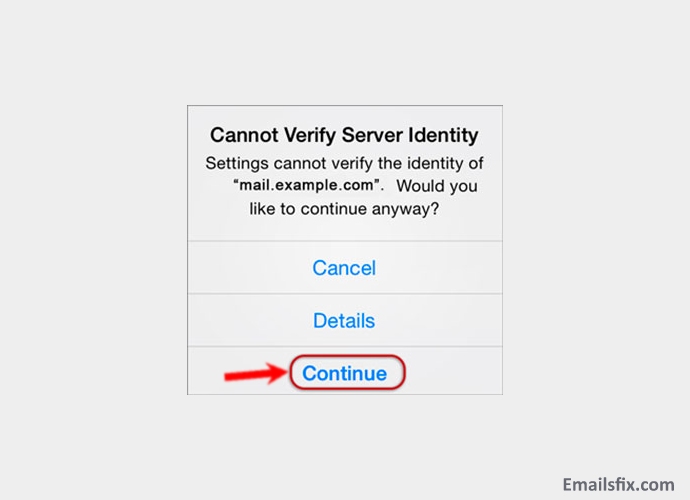
- Later on select “Next”

- You see prompt asking for “cannot verify server identify” then you can click continue.
- Save
- Select Your new account.
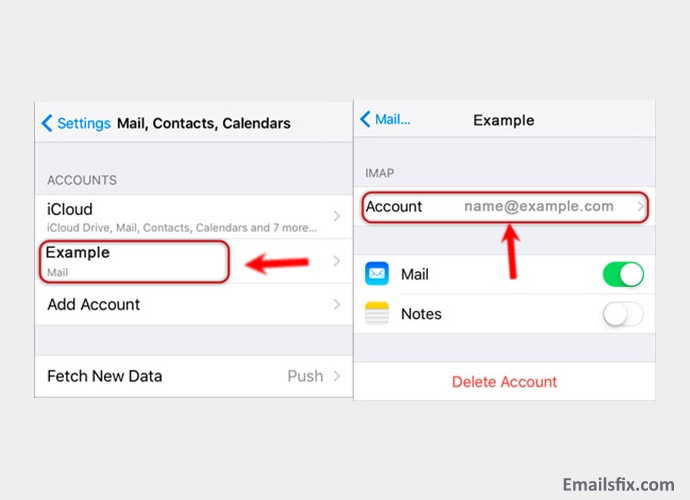
- Select the SMTP server.

Make sure that:-
Your username is the complete Email address
Username and Password are for both incoming and outgoing servers
Added details
Incoming server Host Name
IMap.mail.att.net
Outgoing server Host name
Smtp.mail.att.net
Once all the above steps are followed in sequence, you can be satisfied with the updating of the email set up for the iPhone.
If you will these simple steps then you will be able to set up your account in a matter of minutes. Now, you can access all your AT&T emails on your Android and iPhone devices. If you are not able to set up your account then you can reach out to EmailsFix.com for help and clarification but we don't think you will need it. If you have followed the above- mentioned procedure to the letter then we are confident that you will be able to use the ATT email service on your phone.