ATT.Net Email Settings For Outlook 2013

An outlook is a platform introduced by Microsoft to manage all essential data at one place. The software often gets updated with the latest versions, this recent 2013 launch of Outlook comes with different settings for ATT.NET email.
ATT Email Automatic Setting For Outlook 2013
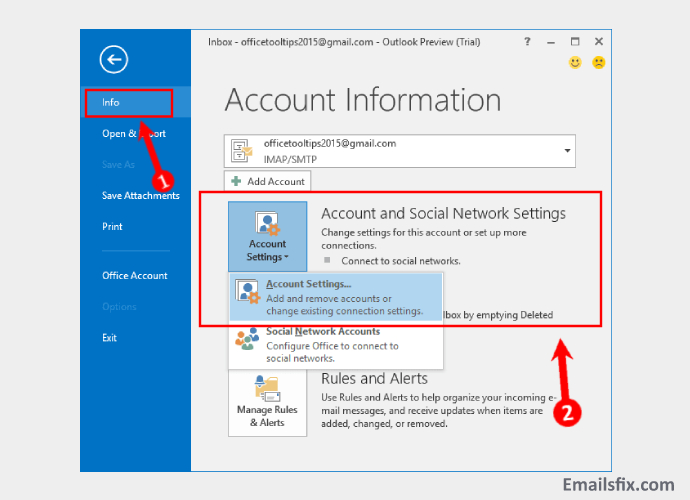
- Launch the outlook webpage and click on files
- Click on Info and account settings
- A screen would pop up and requires filling of details for the Auto set up, By moving further click on “Next”

- Click on allow and choose yes
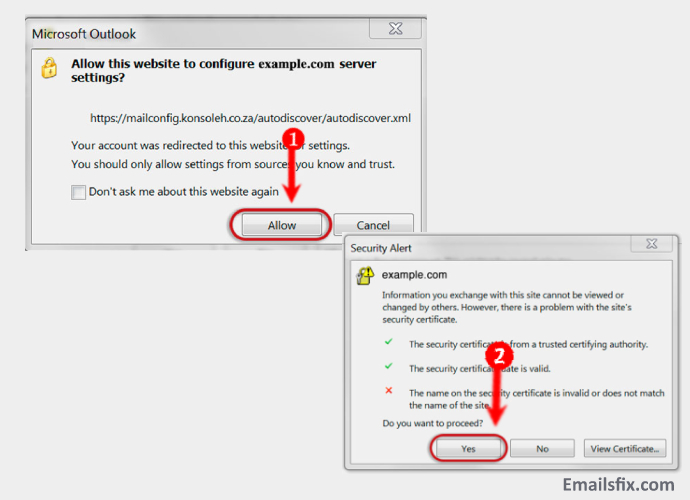
Your outlook will auto-connect with IMAP account with all connected settings.
- Step 4: Click on finish and choose OK
Manual Setting Procedure For ATT Email Setup on Outlook 2013
- Launch the outlook webpage and click on the left side and choose File.
- Click on the info and account settings option.
- Click on Next.
- Choose Manual Setup or additional server types and click on Next.

- You will appear with a window, select POP or IMAP options and Moving ahead click on Next.

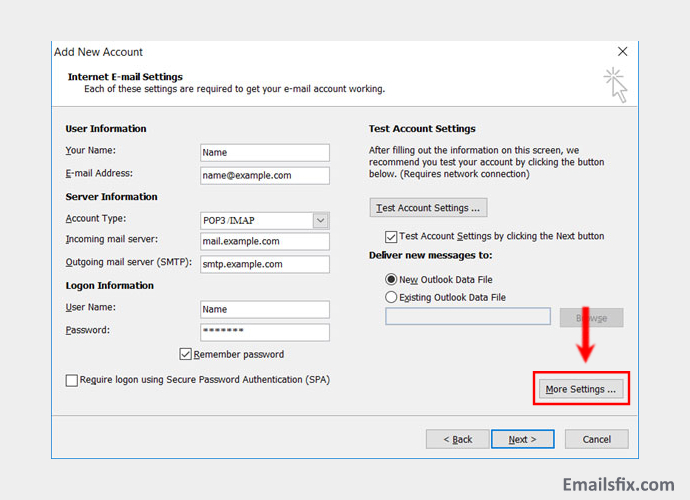
- Go through the blank space and fill in complete details for POP or IMAP settings according to your choice
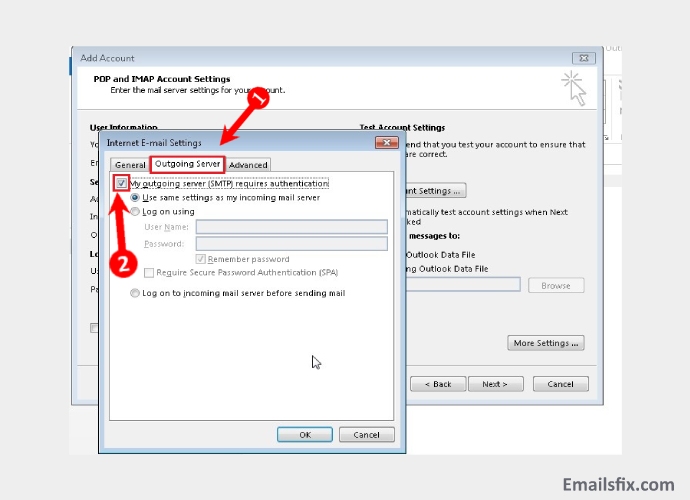
- Once choosing your desired option click on more settings
- Choosing more settings will enable you to click on the outgoing server tab and ensure My outgoing authentication(SMTP) requires authentication
- Now you can select the advanced tab
- Be assure that settings should be selected as POP or IMAP options
Port Settings for ATT.Net

- Incoming Port: 110, Outgoing Port: 465
- General settings for POP
- Secure - Port: 995 and Security Type: SSL/TLS (Accept all certificates)
- Insecure - Port: 110 and Security Type: None (Accept all certificates)
- Not ticked: This server requires an encrypted connection (SSL)
- Use the following type of encrypted connection is None
IMAP Port Settings For ATT.NET

- Incoming Port: 143, Outgoing Port: 465
- Secure - Port: 993and Security Type: SSL/TLS (Accept all certificates)
- Insecure - Port: 143 and Security Type: None (Accept all certificates
- Not ticked: This server requires an encrypted connection (SSL)
- Use the following type of encrypted connection is None
Note: If you use Secure SSL / TLS Settings, check the “This service requires a secure connection (SSL)” box in both outgoing and incoming mails.
General SMTP Port Settings for ATT.NET Email
- Outgoing (SMTP) Secure - Port: 465 for and Security Type: SSL/TLS (Accept all certificates)
- Outgoing (SMTP roaming server) Secure - Port: 587 and Security Type: SSL/TLS (Accept all certificates)
- Outgoing (SMTP) - Port: 25 and Security Type: None (Accept all certificates)
- Outgoing (SMTP roaming server) Insecure - Port: 587 and Security Type: None (Accept all certificates)
Once you are done with the above settings
- 1) Click on Ok
- 2) Later you can click on Next and Finish.
After following steps, If you are still facing any issue setting up ATT.NET Email on Outlook 2013, Contact Emailfix.com chat experts to resolve the issue.